
How to Access Shopify Data From Your App


This is part 3 of 3 of the 3 Technologies That You Need to Learn to Build Your Own Shopify App mini-series.
In this tutorial, we cover how to access Shopify data using GraphQL.
Our goal is to retrieve Shopify shop metadata, such as domain name, subscription plan, and timezone used using the Shop object.
Hello developers!
To make our Shopify app valuable to merchants, we need to retrieve and manipulate data from our Shopify store.
This will be the most exciting part for those into number crunching, data analysis, data aggregation, and cross-systems integration.
Available data for us includes Shopify products, orders, and customers, among other interesting data sets.
Shopify CLI provides a GraphQL layer that gives us easy access to Shopify’s data. This puts GraphQL as the our Technology #3 that you need to learn to build your own Shopify app. (As a refresher, here’s Technology #1 and Technology #2)
3.) GraphQL
According to graphql.org, GraphQL is both the “1.) query language for APIs and 2.) a runtime for fulfilling those queries with your existing data”.
It is then both the query language that we need to speak to get and change data, and at the same time it is also the technology stack that enables us to get data using the said query language.
What’s exciting is that Shopify CLI provides React Hooks (via Apollo React Client) that allows us to declare GraphQL queries from the React level. This makes app creation really fast and convenient (and I’d say more fun too!).
So, enough chitchat. How do we access Shopify data using GraphQL?
Objective
To reiterate, our objective is to retrieve Shopify shop metadata, such as domain name, subscription plan, and timezone used using the Shop object.
3.0) Ensure your Shopify app is running on your development environment
The instructions below will make more sense if you can run and play around with it. Thus, you need to ensure that you have a properly setup, authenticated, and running Shopify development app before proceeding.
If you need to quickly spin up a Shopify application, I suggest you download our tutorial on how to build your first Shopify app.
For convenience, a sample implementation can also be found here.
3.1) Build your GraphQL query inside your React application
First step is to create a string GraphQL query in your React codebase as seen on the above snippet. Don’t worry yet about the gql tagged template literal — we’ll get to that.
One thing that you’d notice is that GraphQL queries look like an “empty JSON shell” – only the keys are provided, without values. This is intended as the return value will be an object with that exact same “shape” (i.e., use the same keys that you provided), but with the requested values filled in.
To demonstrate, if we put the query result in data, the subscription plan name can be accessed via data.shop.plan.displayName. Once the lightbulb clicks, you’d be amazed how easy it is to query data.
- Line
4declares that we intend to onlyquerydata, and not to change it. - Line
5states that we query theshopqueryable object provided by Shopify. - Lines
6 - 15are fields of theshopobject that we are interested in. Unlike a REST API response where you get all the fields whether you need them or not, you can select as few or as many fields in your request. This is comparable to theSELECT field1, field2, ...statement in SQL. - You can also observe that some fields do not have children (such as
id,name,myshopifyDomain, andtimezoneAbbreviation). They are said to be as scalars, and we expect the response in these fields to be primitive data types. - Some fields have children of their own (such as
primaryDomainandplan) because we expect these fields to be populated withobjects. Asobjects, they have their own fields and types.
Let’s now return to the reason we need the gql template literal tag. We need the gql tag to convert string into a syntax tree object for the GraphQL client.
For us humans, representing the query as GraphQL strings is very visual and convenient. In one glance, we can easily “get” the structure of the request and the expected query response. However, for the GraphQL client, strings are “are inconvenient to manipulate, if you are trying to do things like add extra fields, merge multiple queries together, or other interesting stuff”.
In short, just always use gql in your queries ;)
With that, our GraphQL query is ready to be used!
3.2) Create a function that will execute your query
Once we have our GraphQL query all prepped up, we need to create a function to signal execution of our query. Also, we need to store the resulting data, and other metadata such as errors and query status.
We can use Apollo Client’s useLazyQuery react hook to do this.
fetchStoreDetailswill contain the function to be executed on demand (in our case, on a press of a button).datawill contain the GraphQL response, if successful.errorwill have value only if our GraphQL request is unsuccessful.loadingis a bolean that indicates whether our GraphQL server is done with the query, or whether it is still ongoing. Works wonderfully with the Polaris Spinner Component to let the user know that something is still happening in the background, (and is worth the wait!)
3.3) Invoke your function and capture results
Once we have the function and the data variables setup, the final thing we need to do is connect our function to an event that interests us. In our case, let’s use a Button click as a trigger to start the query.
We dump data that has been retrieved into a Polaris Data Table Component.
- Lines
18 - 20and24invokesfetchStoreDetails()whenever ourButtonis clicked. - Before clicking,
datawill benil, and thus the data table will not be displayed due to the condition in line26. - Clicking the
Buttonwill populatedatafrom the Shopify GraphQL server. Again, note that the object keys correspond to the GraphQL query that we sent. - Once
datais populated, the data table will render accordingly.
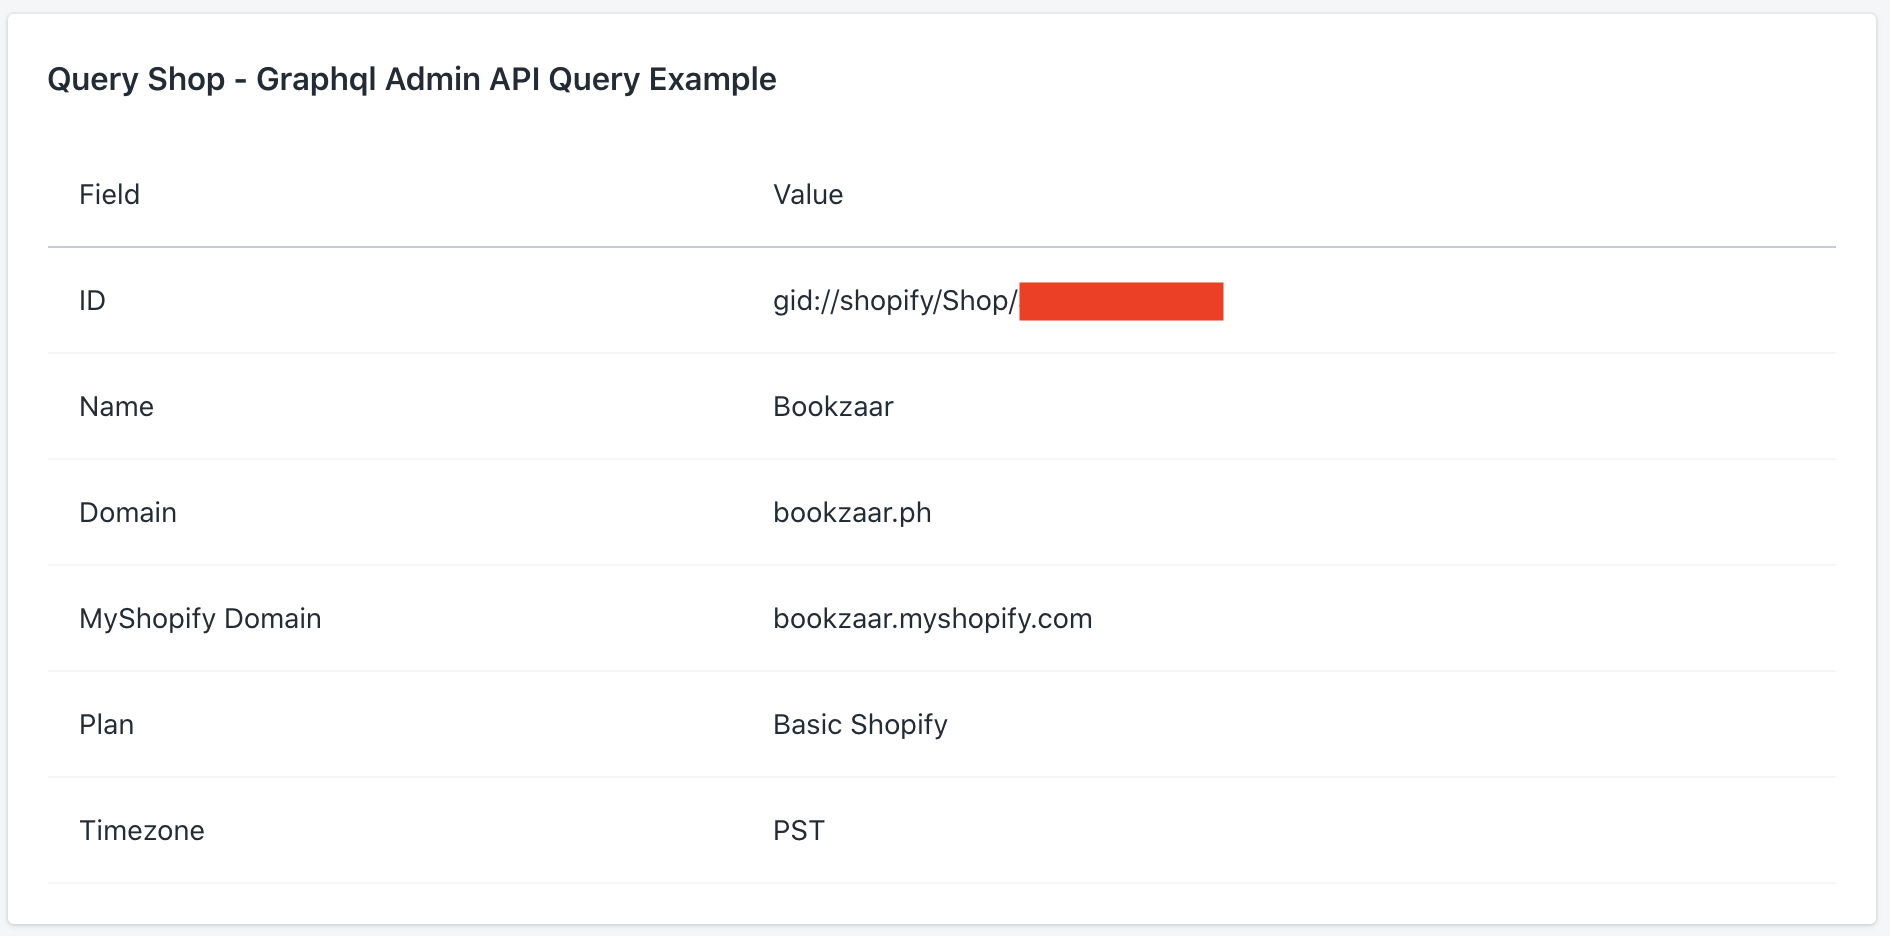
If done correctly, your data table should look something similar to this:
On my next post, let’s discuss how to add, update, and delete using GraphQL.