
How to Deploy Your Shopify CLI App on AWS EC2 using Docker

You must be able to host your Shopify CLI App before merchants can install your app in their stores. Among the plethora of available hosts to us, Amazon Web Services (AWS) Elastic Compute Cloud (EC2) is a strong contender.
 Photo by Kelly Sikkema on Unsplash
Before I start any religious war on hosting, deployment, and DevOps, I’ll throw this caveat early on: There’s more than one way to cook an egg. (There’s a version that involves a cat that some pet-lovers might offensive). There are a hundred different alternatives to AWS, as there are a thousand different ways do deploy Shopify inside AWS.
I’ll describe the one that works for me, simply because I have a specific set of requirements. If you believe your setup works as well, please comment it down below.
My requirements for my Shopify app host:
It must always be up, and it must be fast enough for customers to be happy.
We then immediately disqualify AWS t2.micro and Heroku’s free tier. In my experience, t2.micro's sshd dies on me often, that it requires me to terminate the instance (yes terminate, not stop), and redo everything all over again.
Heroku’s free tier tends to sleep when not needed, and you will never want that for your customers.
Architecture and deployment must be as simple as possible, so I can focus more on building apps and writing tutorials.
The last thing I want to do is tear my hair debugging erroneous Chef scripts or Kubernetes pods going crazy. I do not wish to add another level of complexity.
It must be able to host as many Shopify apps as I can squeeze in.
I am experimenting on several Shopify apps at a time, and I will not stop anytime soon. I do not want my bill to behave similarly. Linear cost growth, where there is an increase in price for every app added, is not enough to be considered cost-effective.
Absolute control on all servers.
I require SSH and sudo access to all my instances. Call me a control freak.
With all the disclaimers out of the way, we can begin!
1.) Create an Ubuntu m3.medium EC2 instance.
Go ahead and create an m3.medium Ubuntu EC2 instance for our server. This instance type seems to be the minimum for a production-grade server. You can cram up to 5 low-traffic Shopify apps in this type. Your mileage will vary widely, depending on the traffic and amount of computation happening for each Shopify app.
2.) Configure the Domain Name System (DNS).
Each one of your apps will need a URL. It is, therefore, essential to have the domains or subdomains pointed to our server early on. Several configurations will require such URL, and setting them up now will prevent any future hassle.
I personally use AWS Route53 to configure my DNS, but any DNS setup would do, as long as the URL is pointed correctly to the correct server. For our example, we set our demo app to app1.klaudsol.com.
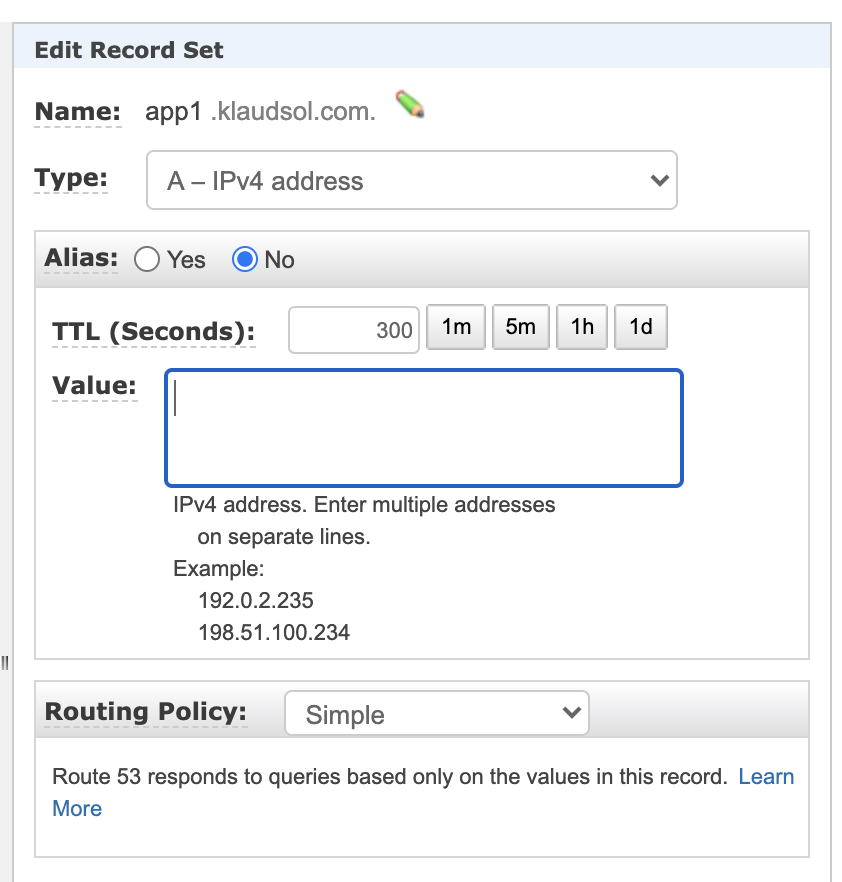
Your instance may have more than one hostname associated with it. We will be using Nginx to allow virtual hosting and enable multiple apps with multiple hostnames to live on our server in harmony. We will see more of Nginx virtual hosting later.
3.) Install Docker and Docker Compose.
Once you have your newly-minted server, install docker and docker-compose. Make sure you executed the “Executing the Docker Command Without Sudo” section.
To test if your docker setup is flawless, run the following command:
If done right, you should see the following response:
4.) Clone all your apps inside a single subdirectory.
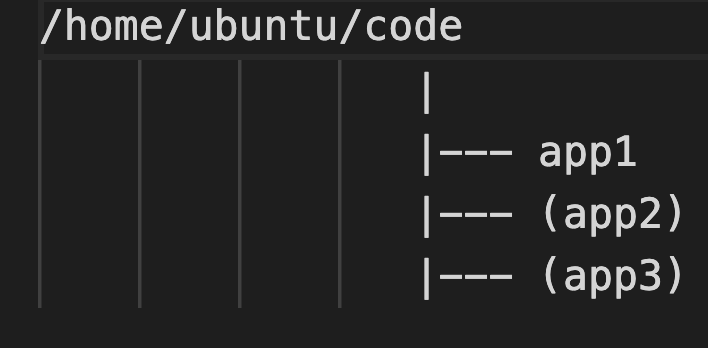
We plan on deploying multiple apps in this server to squeeze it with as much value as we can run away with. We organize these apps by placing them in a single subdirectory.
For the purpose of example, we clone all of our apps and place them inside the directory /home/ubuntu/code. In the meantime, we only have one app to deploy, but we know where to add succeeding apps.
5.) Create a new app on the Shopify Partner dashboard for production.
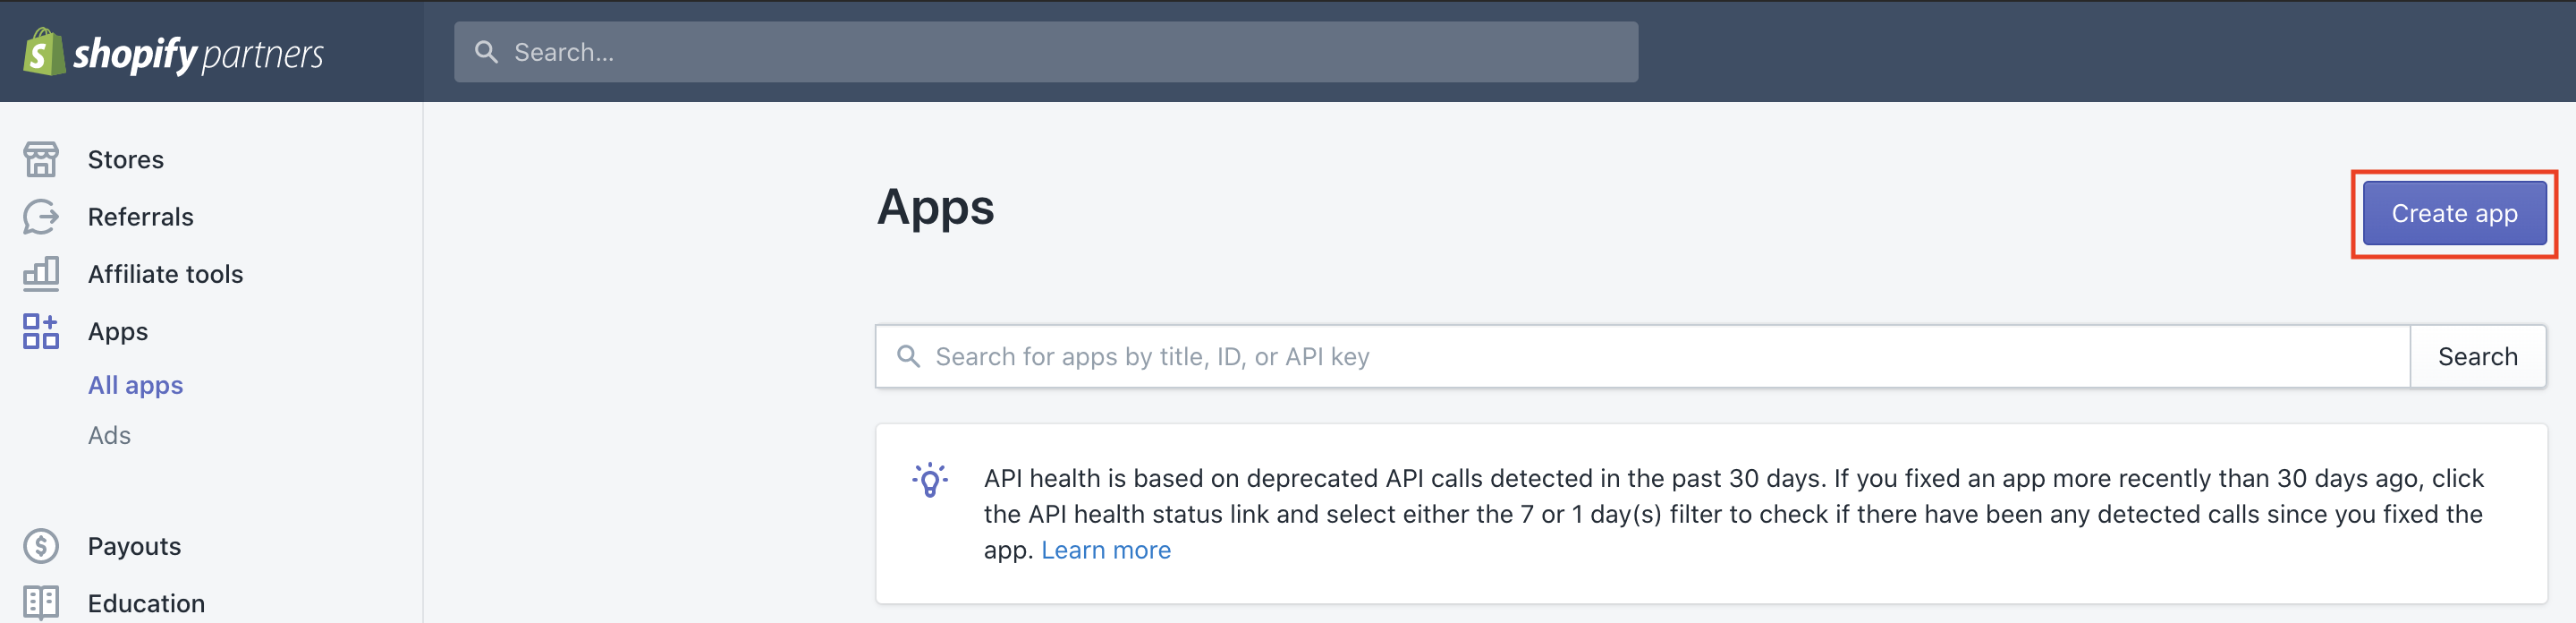
Aside from a common source code base, your production app must be totally separate and independent of your development app, for various good reasons. Development apps are expected to evolve and change quickly as new features and fixes are written. Production apps are expected to be stable, reliable, and always available for the customer.
6.) Update the .env file
Since we are registering a totally new app on the Shopify Partner dashboard, some of our environment variables will need updating. Check that these variables contain the proper values:
6.1) SHOPIFY_API_KEY - double-check that this matches with the Production app API key, and not the one from development.
6.2) SHOPIFY_API_SECRET - Like the API key, we mustn’t forget to point this to the new production app value.
6.3) HOST - Ensure that this value matches the URL that we have set in step 2.
7.) Add docker-compose.yml and endpoint.sh
You need to add these files to configure how we run our docker containers.
/home/ubuntu/code/docker-compose.yml
We see from the code above that we use the jwilder/nginx-proxy image (line 3) to set up a reverse proxy. This reverse proxy enables us to host multiple apps simultaneously while being accessible from a single port (443).
Using an nginx image as a reverse proxy also allows us to centralize our certificates for easier management, as we shall see in step 7.
Lines 11 - 21 defines the container needed for us to run app1. Ensure that the VIRTUAL_HOST environment matches the URL declared in step 2 for the proxy to work.
To add more apps, just add another entry in the docker-compose.yml (e.g. app2), with the appropriate VIRTUAL_HOST and matching DNS declaration.
Line 15 tells us to execute /app/entrypoint.sh on our script. You may have noticed already that we do not have this file yet in our system, and it is our task to create it now.
/home/ubuntu/code/app1/entrypoint.sh
The file entrypoint.sh is a small shell script that tells us to build and run our app as the last step in creating our docker container. Ensure that the system can execute this by changing its file permissions, or it will fail to launch our docker container.
8.) Prepare SSL/TLS Certificates.
Due to strict Cross-Origin Resource Sharing (CORS) rules, Shopify apps will only work if 1.) the app URL is called back using the https protocol, and 2.) if the URL does NOT have a specific port number attached to it (thus preventing you from using any other port than 443).
It is thus vital that we get our https setup correct. One easy way to do this is to let our Nginx proxy handle the certificates management.
As per line 10 of our docker-compose.yml, we put our SSL certificates at /var/certs. Note that we must follow the naming convention.
app1.klaudsol.com.crt - this is your signed certificate. This file must be named <domain>.crt.
app1.klaudsol.com.key - this is your private key. This file must be named as <domain>.crt.
You may purchase this usually from domain name service providers and web hosts to have a valid certificate for 1 year.
You can also use Let’s Encrypt to get free certificates. If you choose to use this, make sure you automate the renewal since it only gives you certificates with 90-day validity.
9.) Open up relevant ports.
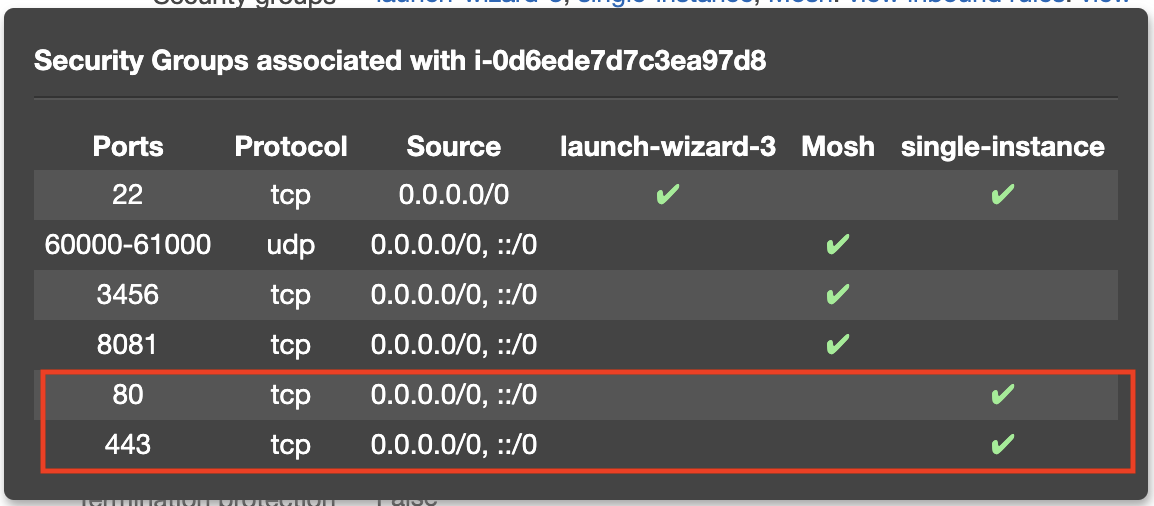
Ensure that ports 80 and 443 are open for the world to access your brand spanking new Shopify app.
To do this in AWS, make sure that your instance belongs to a security group with ports 80 and 443 open.
10.) Up, up, and away!
When everything is in its proper place, it’s time to start our containers, and let the fun begin. We can do this by executing the following docker commands:
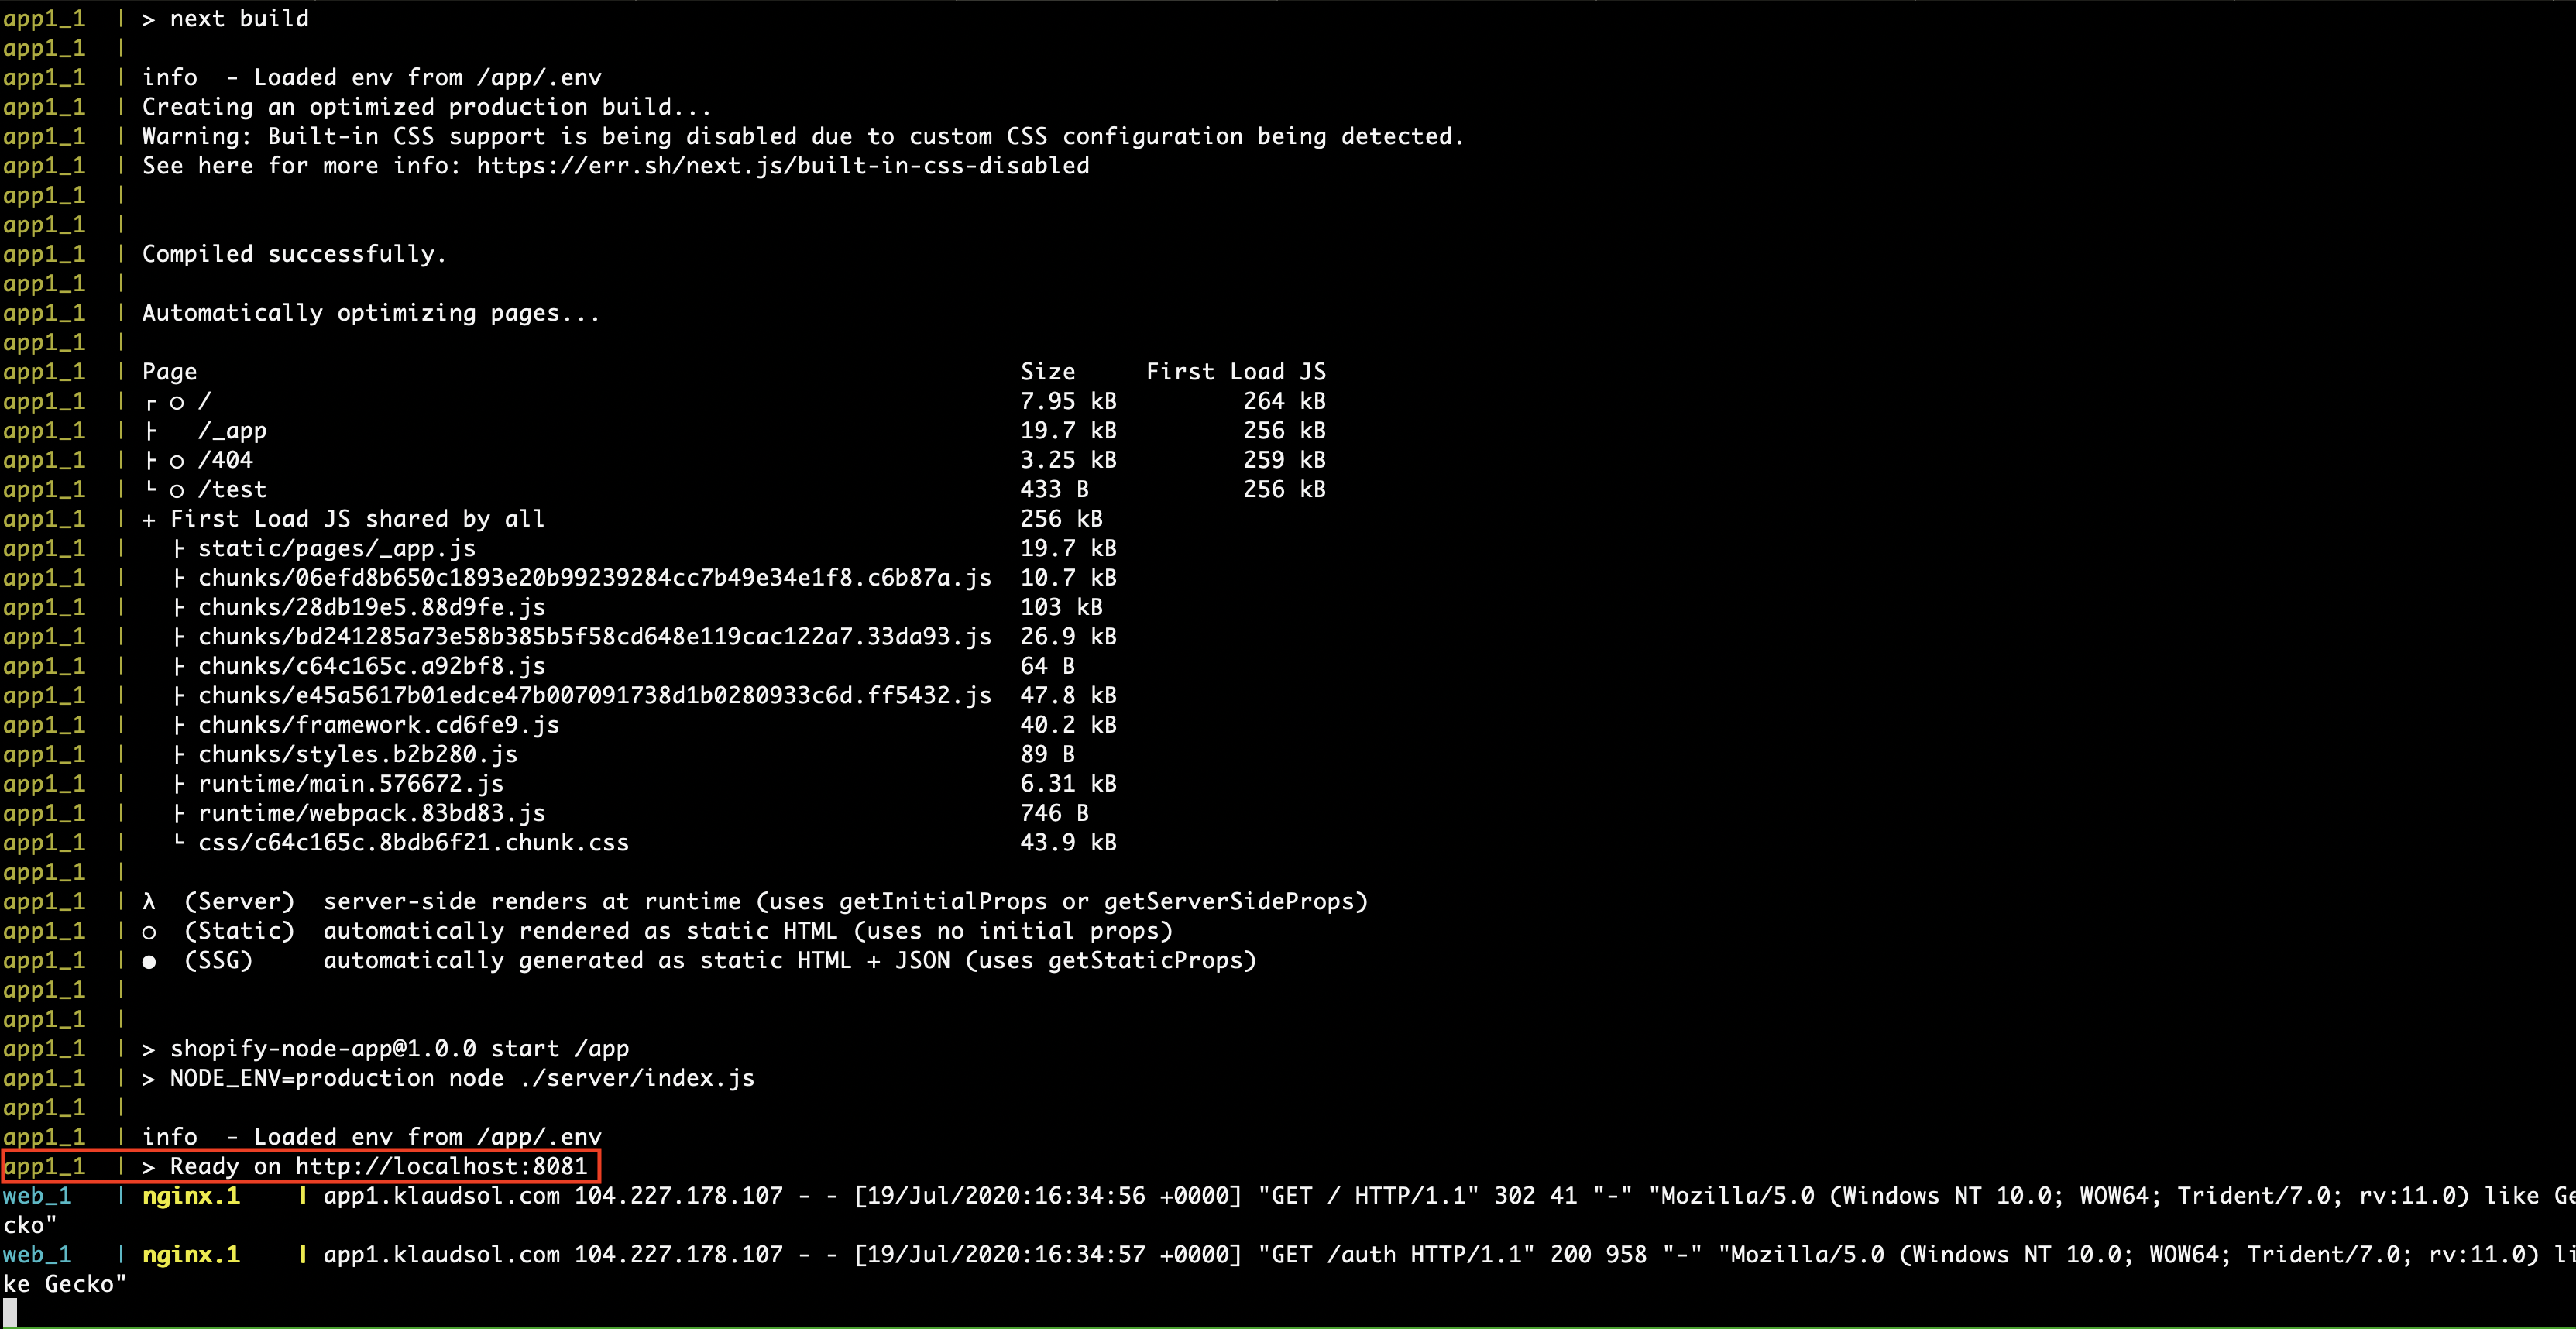
Your console must display the message > Ready on http://localhost:8081 if everything has been done accordingly up to this point.
11.) See if it works.
The best way to test your app is to install it in a development store.
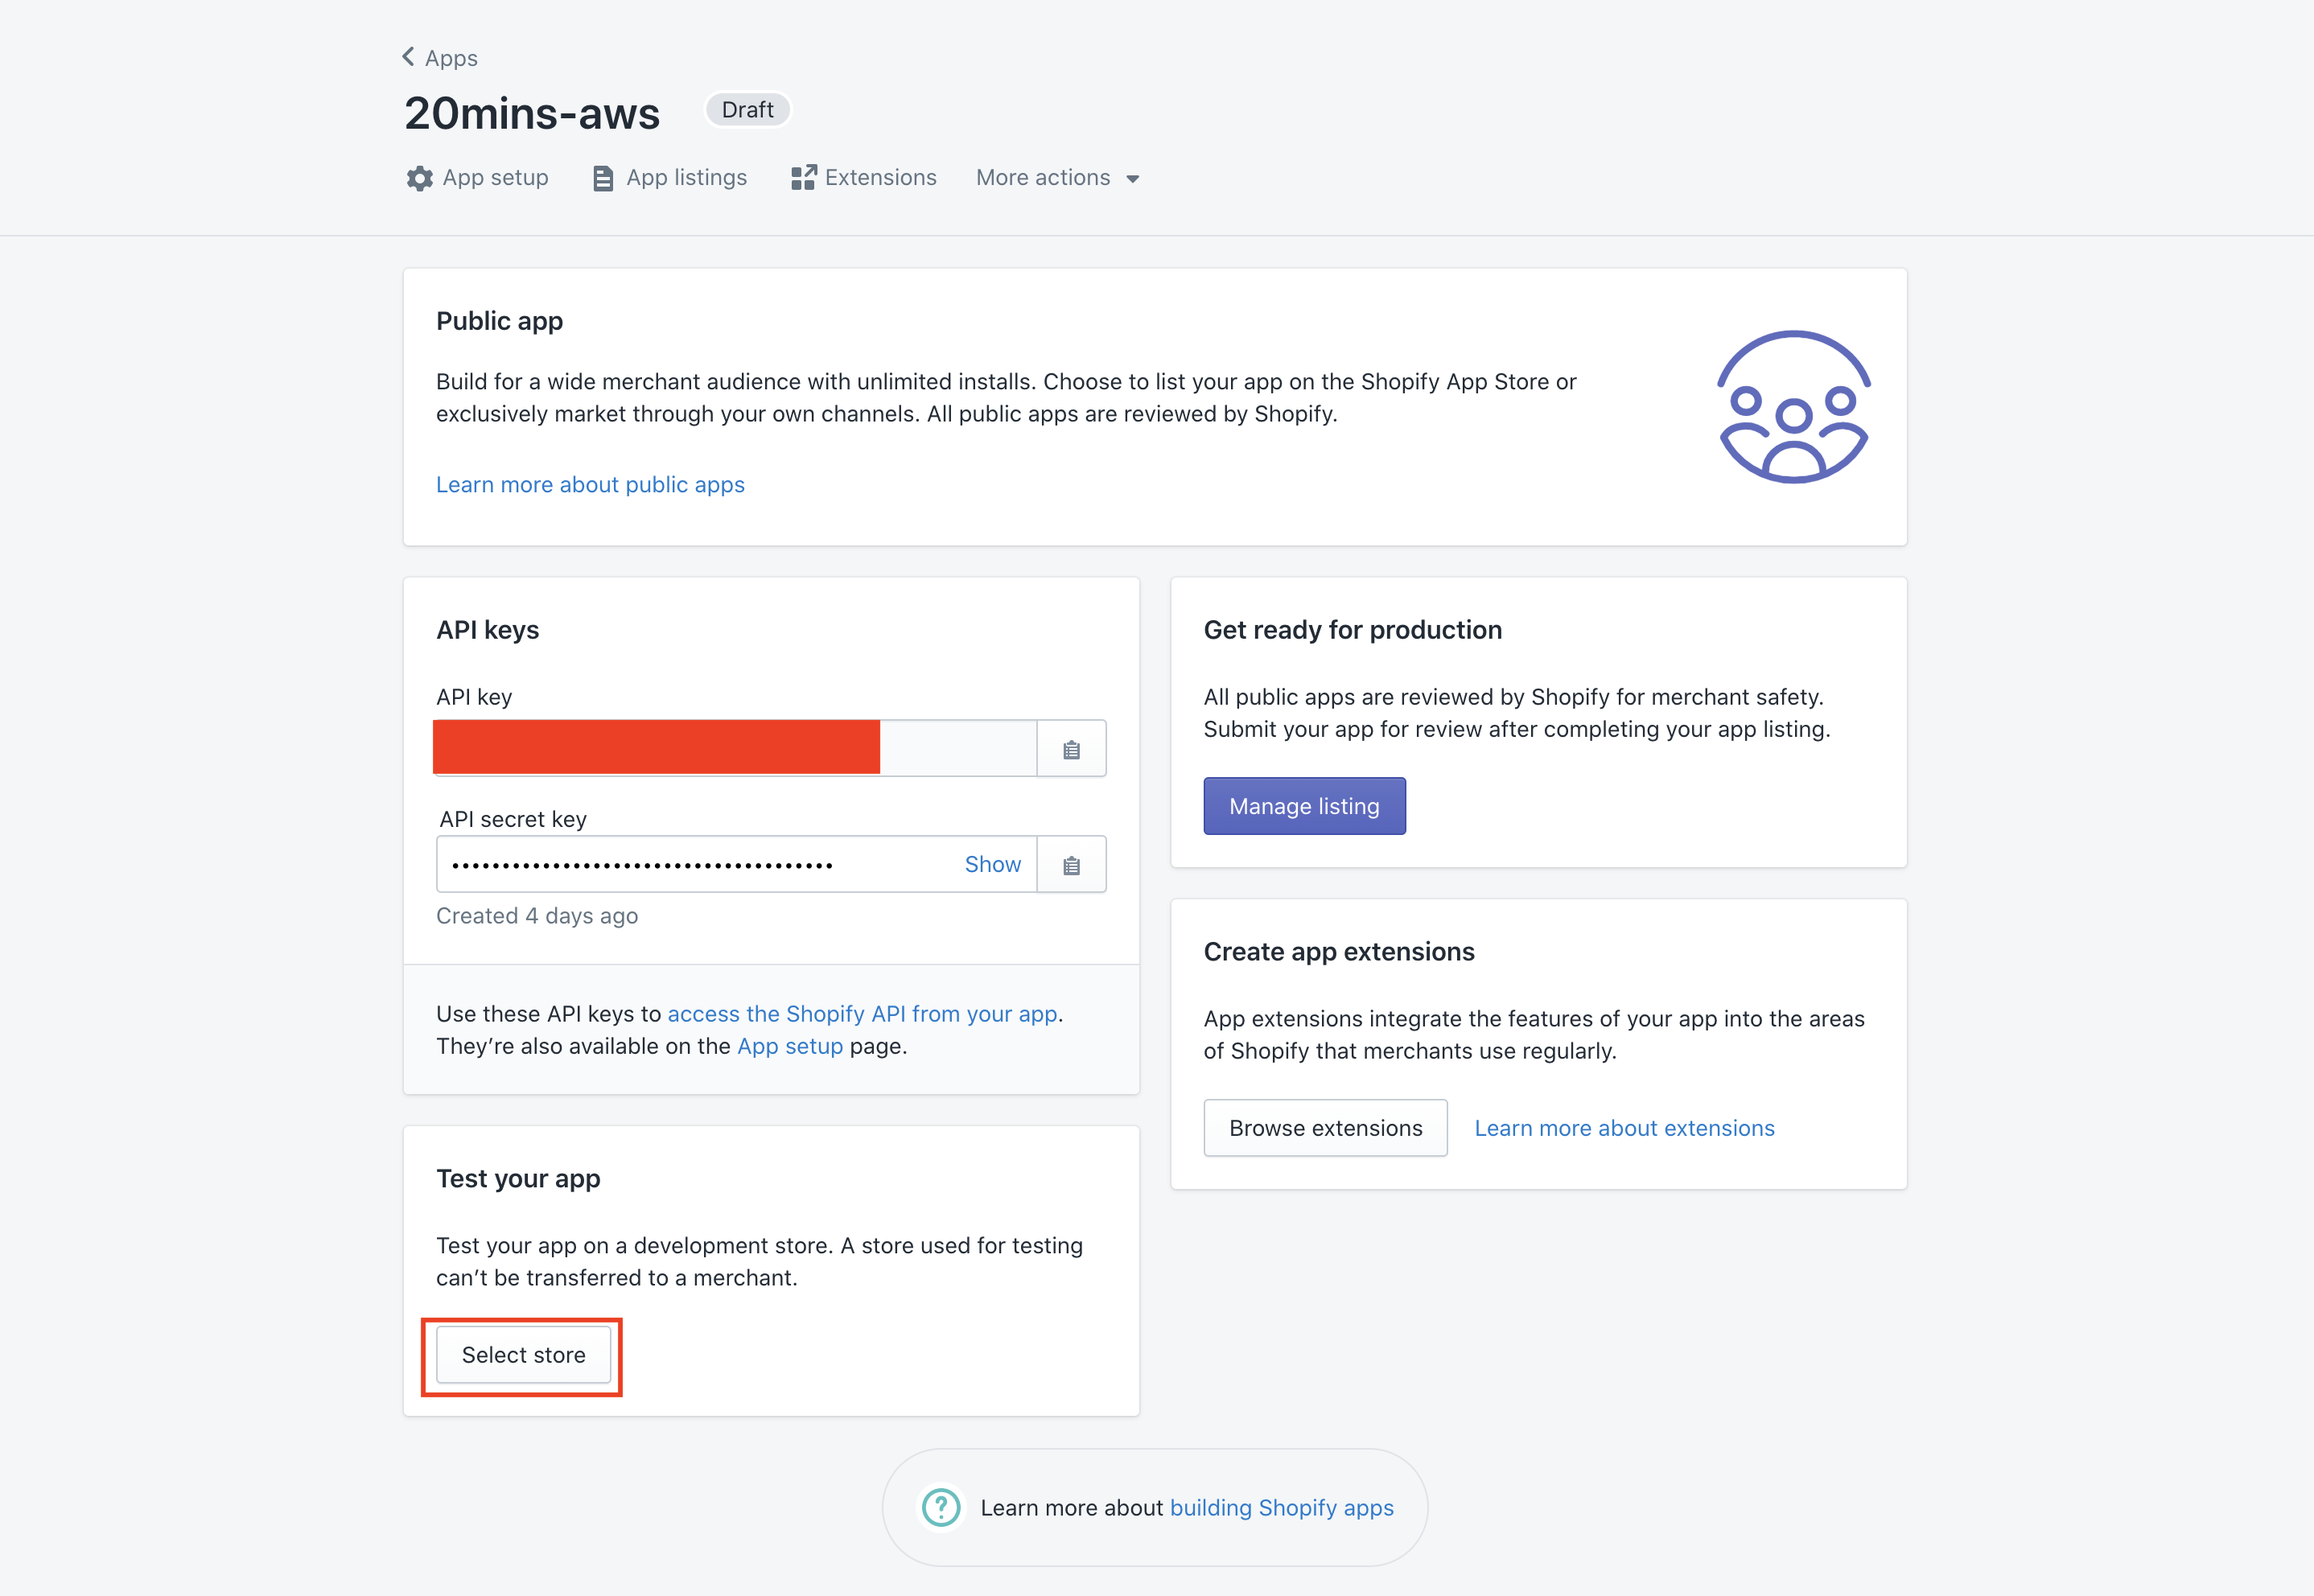
Go to your production app dashboard, go to the “Test your app” panel, and click “Select store.”
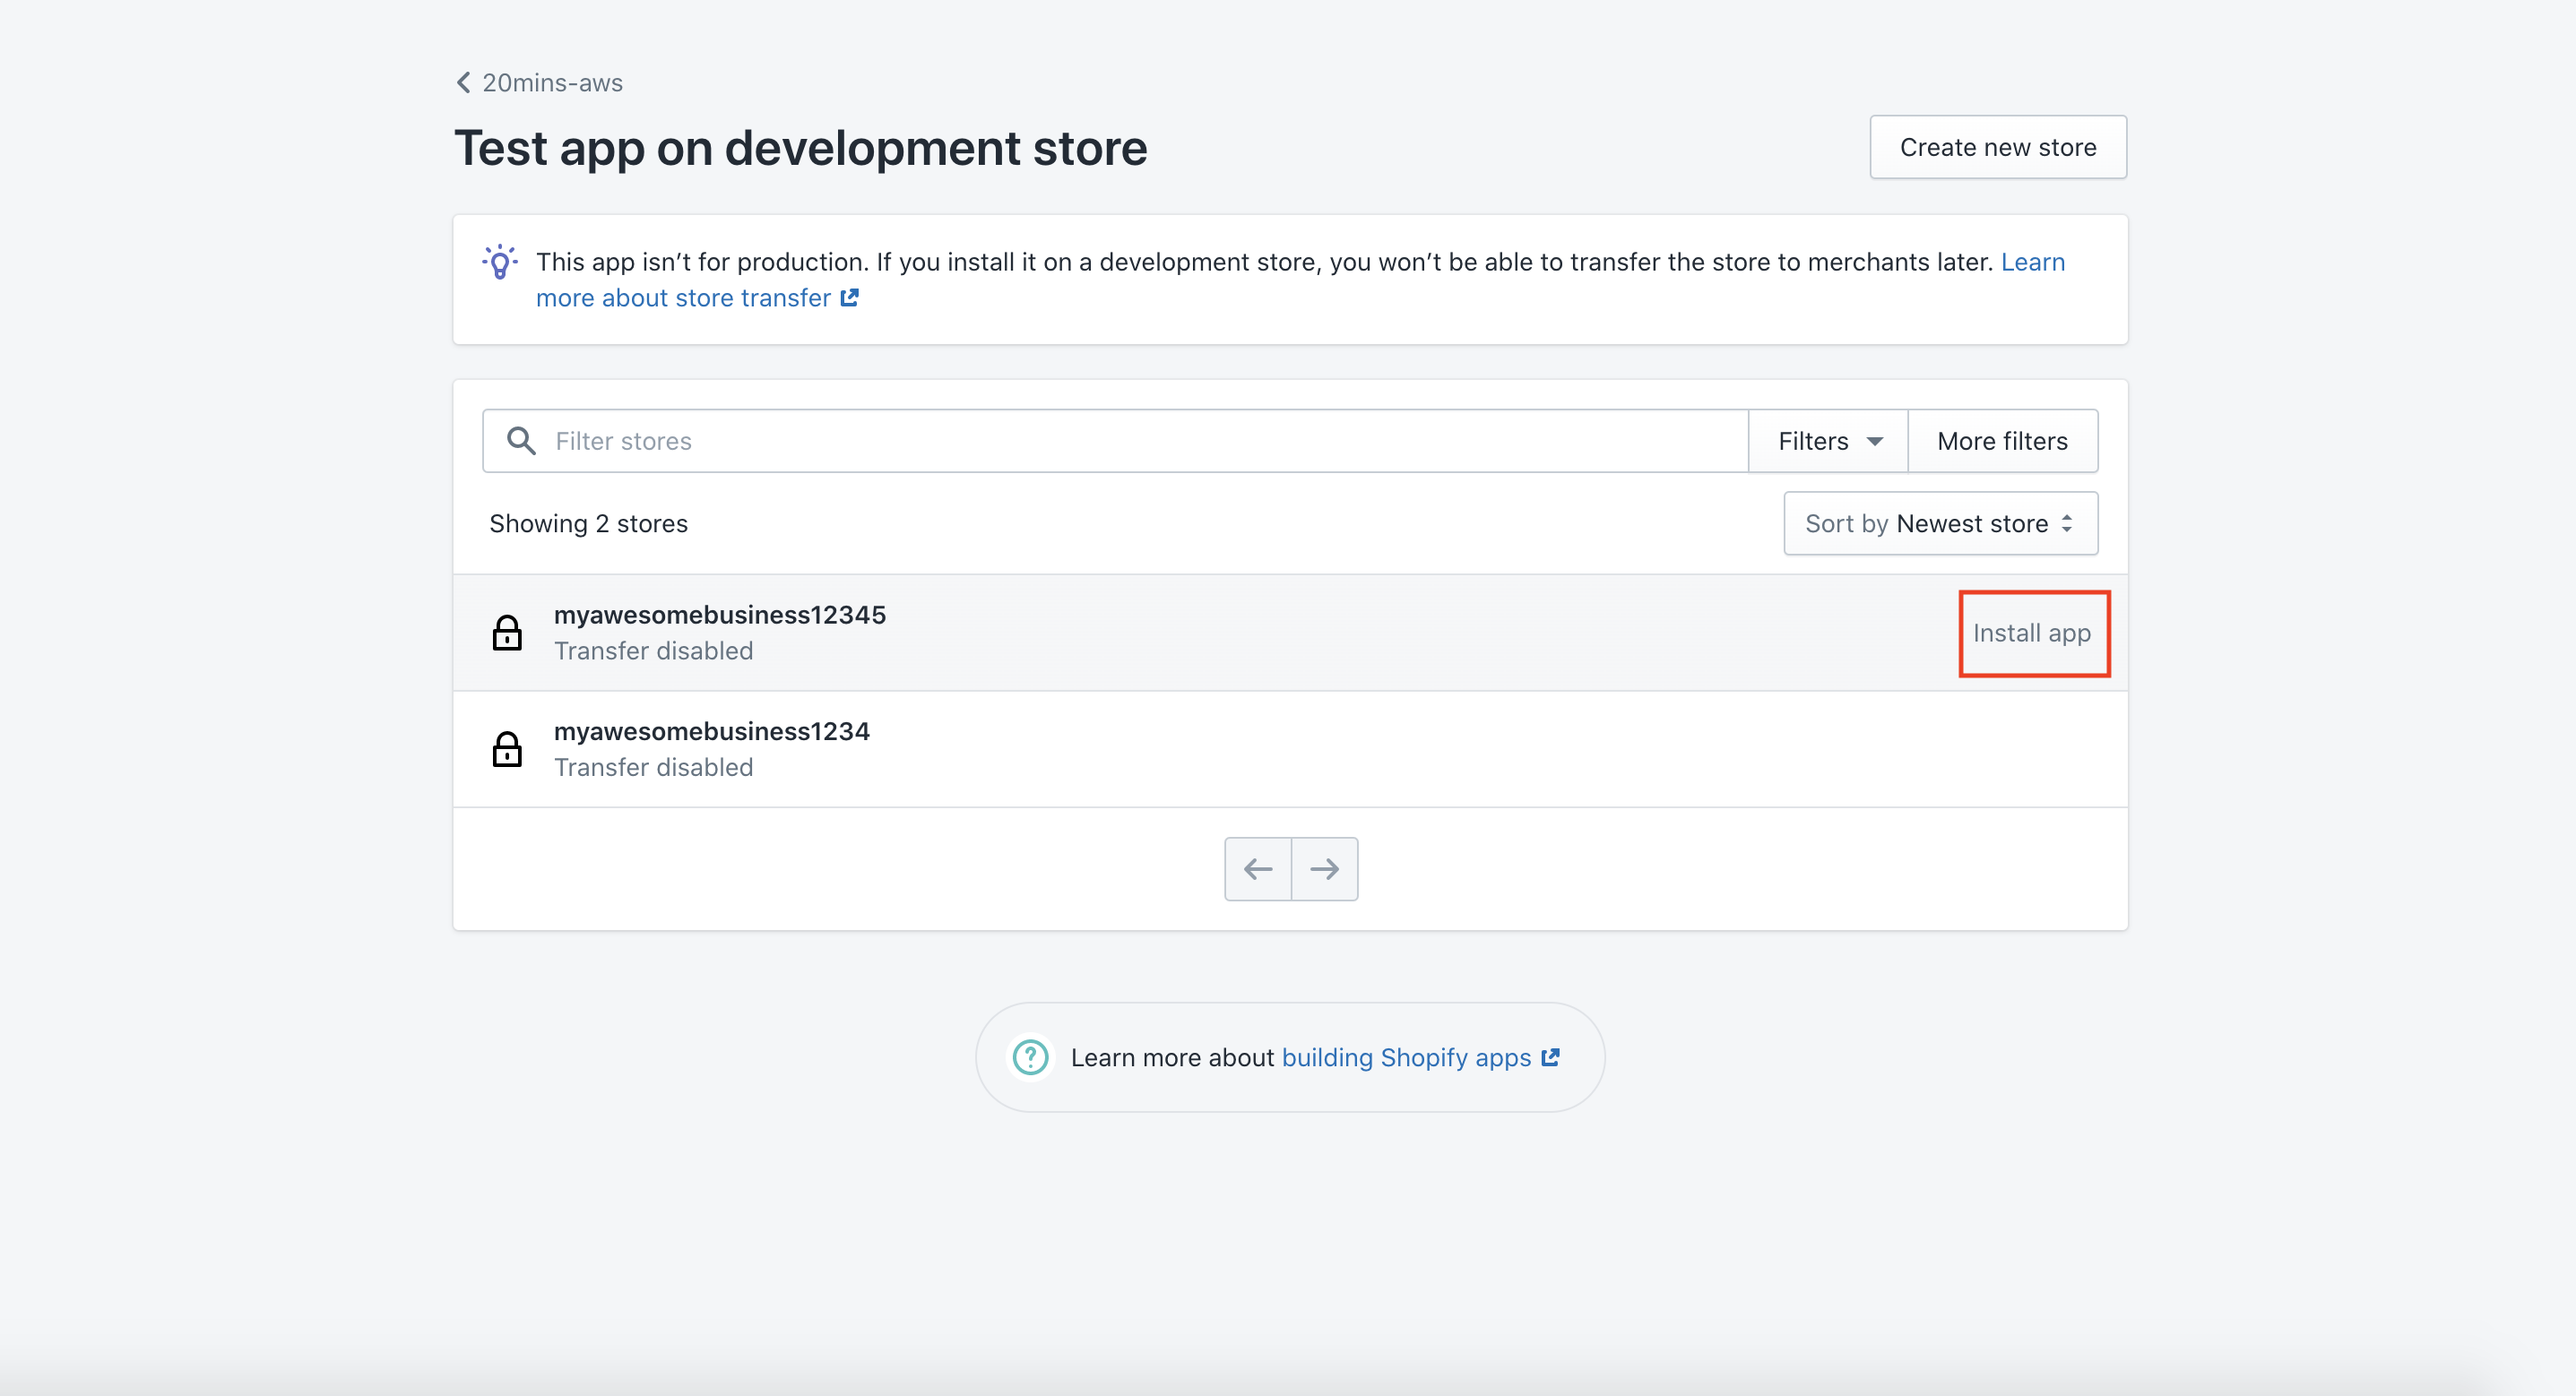
Choose which development store to install, then click “Install app.”
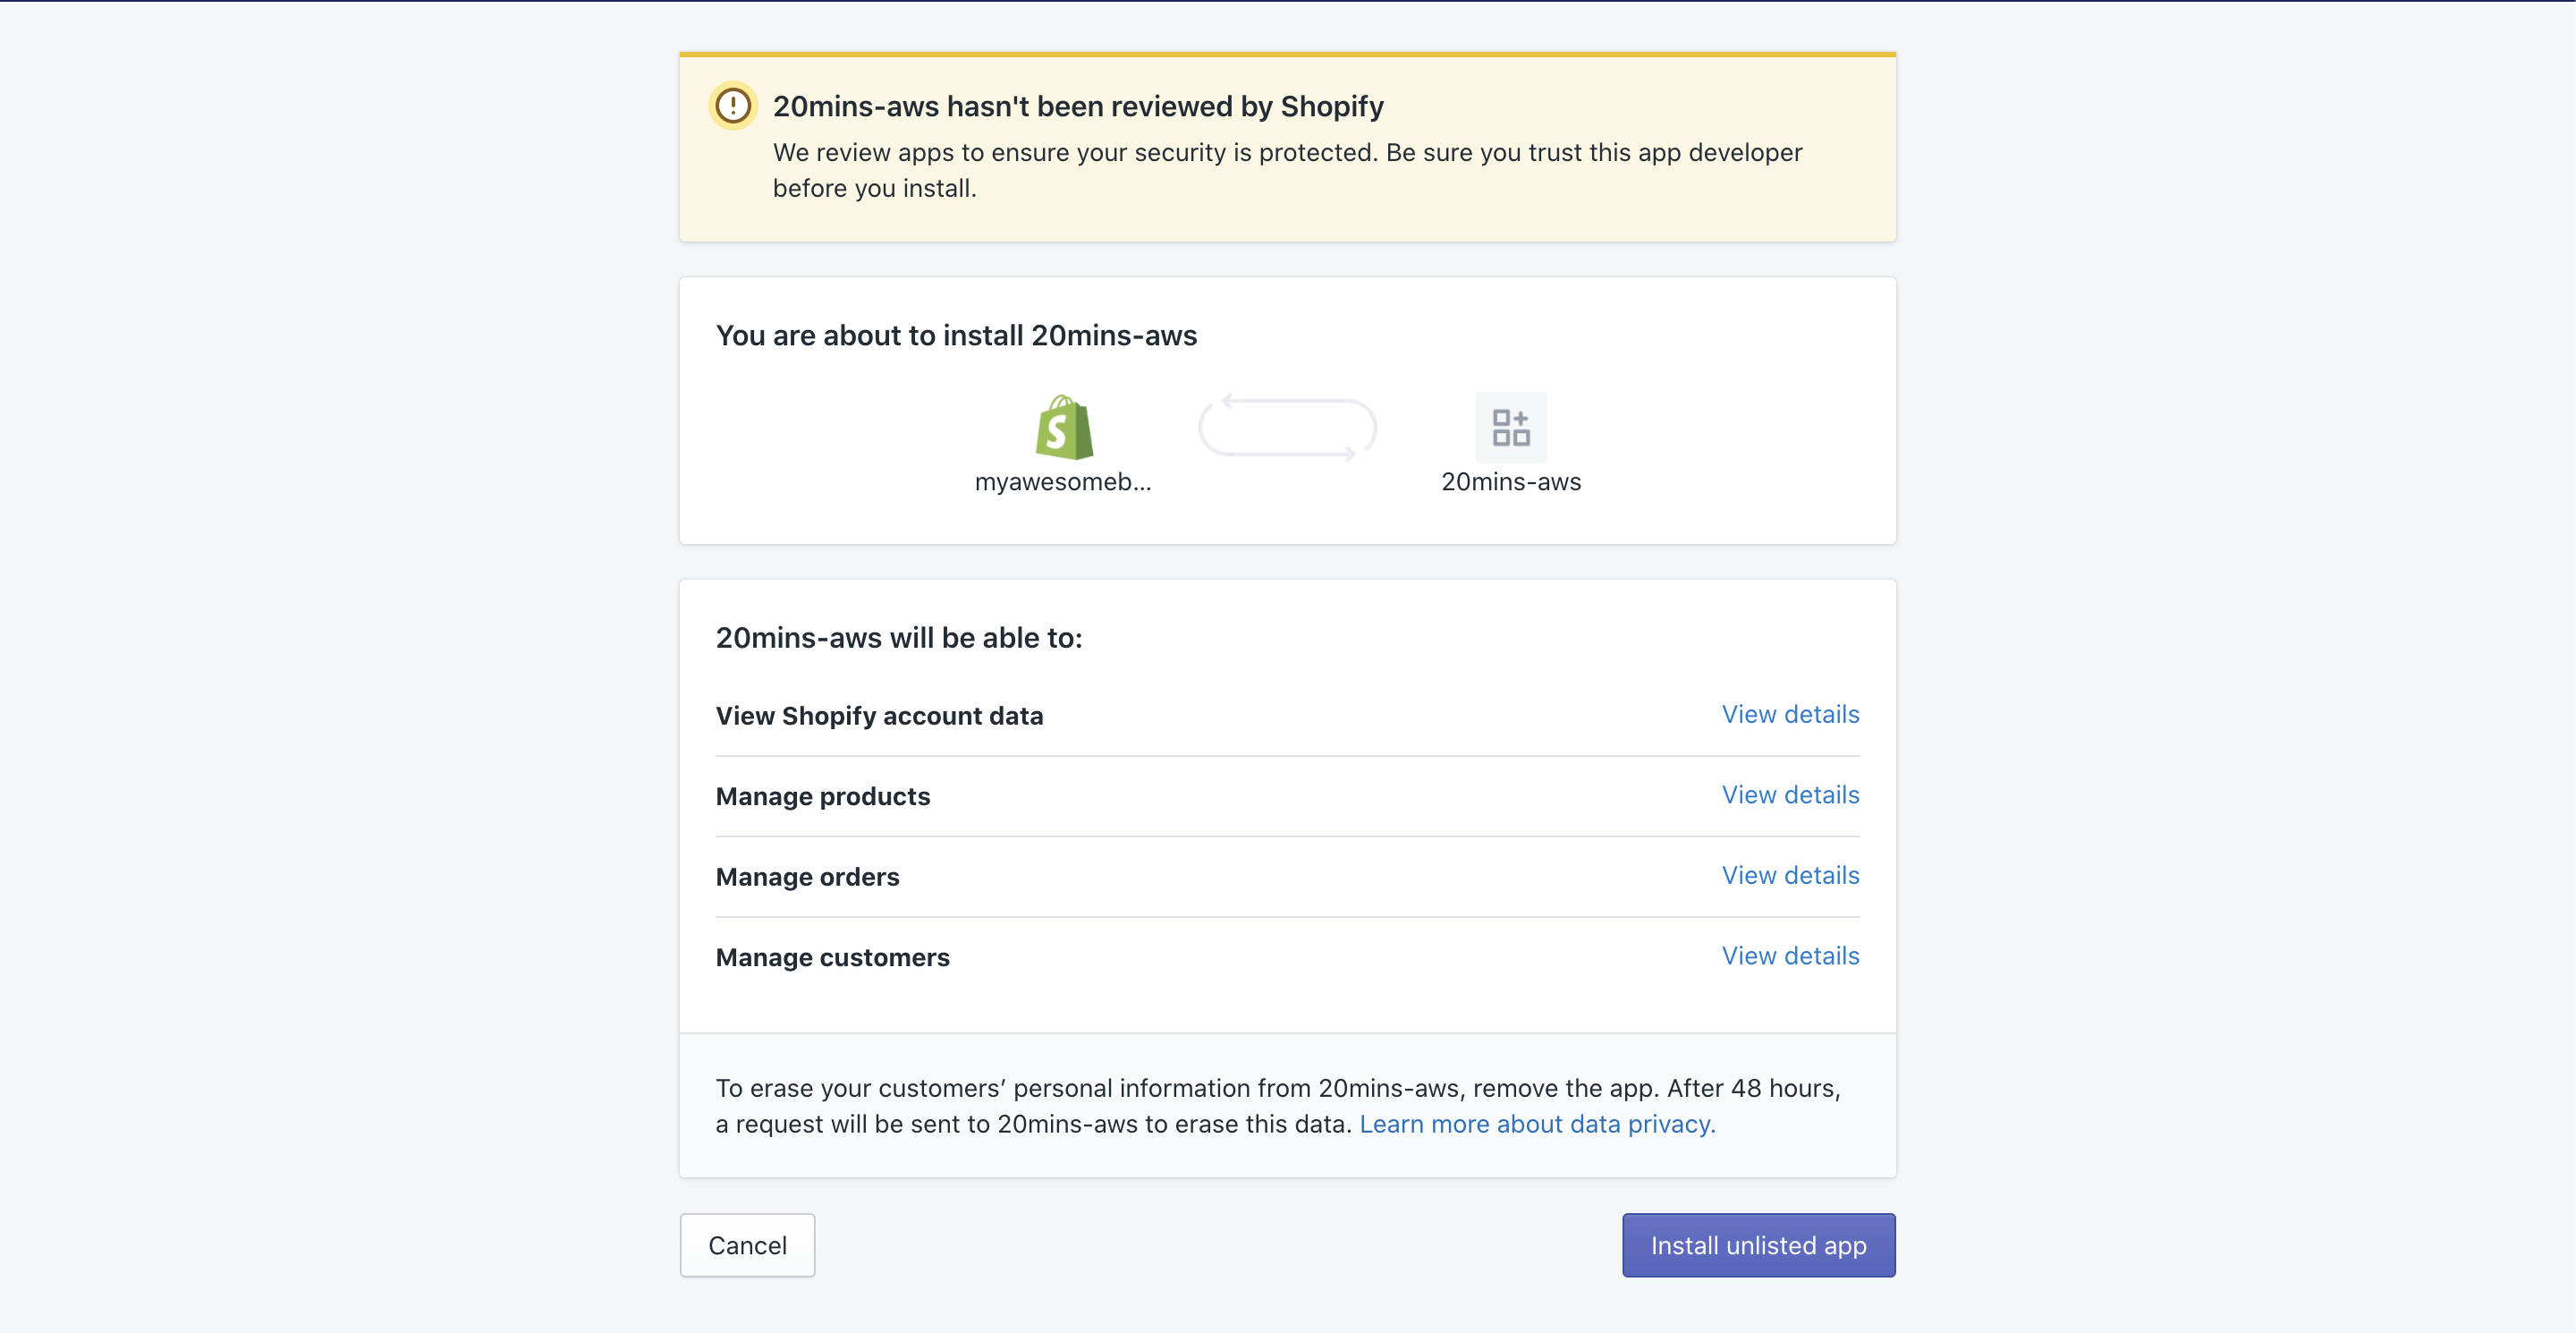
If your app is properly deployed, you should be able to see the installation window above.
Learned anything from this tutorial? Got further questions that haven’t been answered yet? Comment your queries below, and I’ll get back to you as soon as I can.