
How to run Shopify CLI in AWS Cloud 9

 AWS Cloud9 in action.
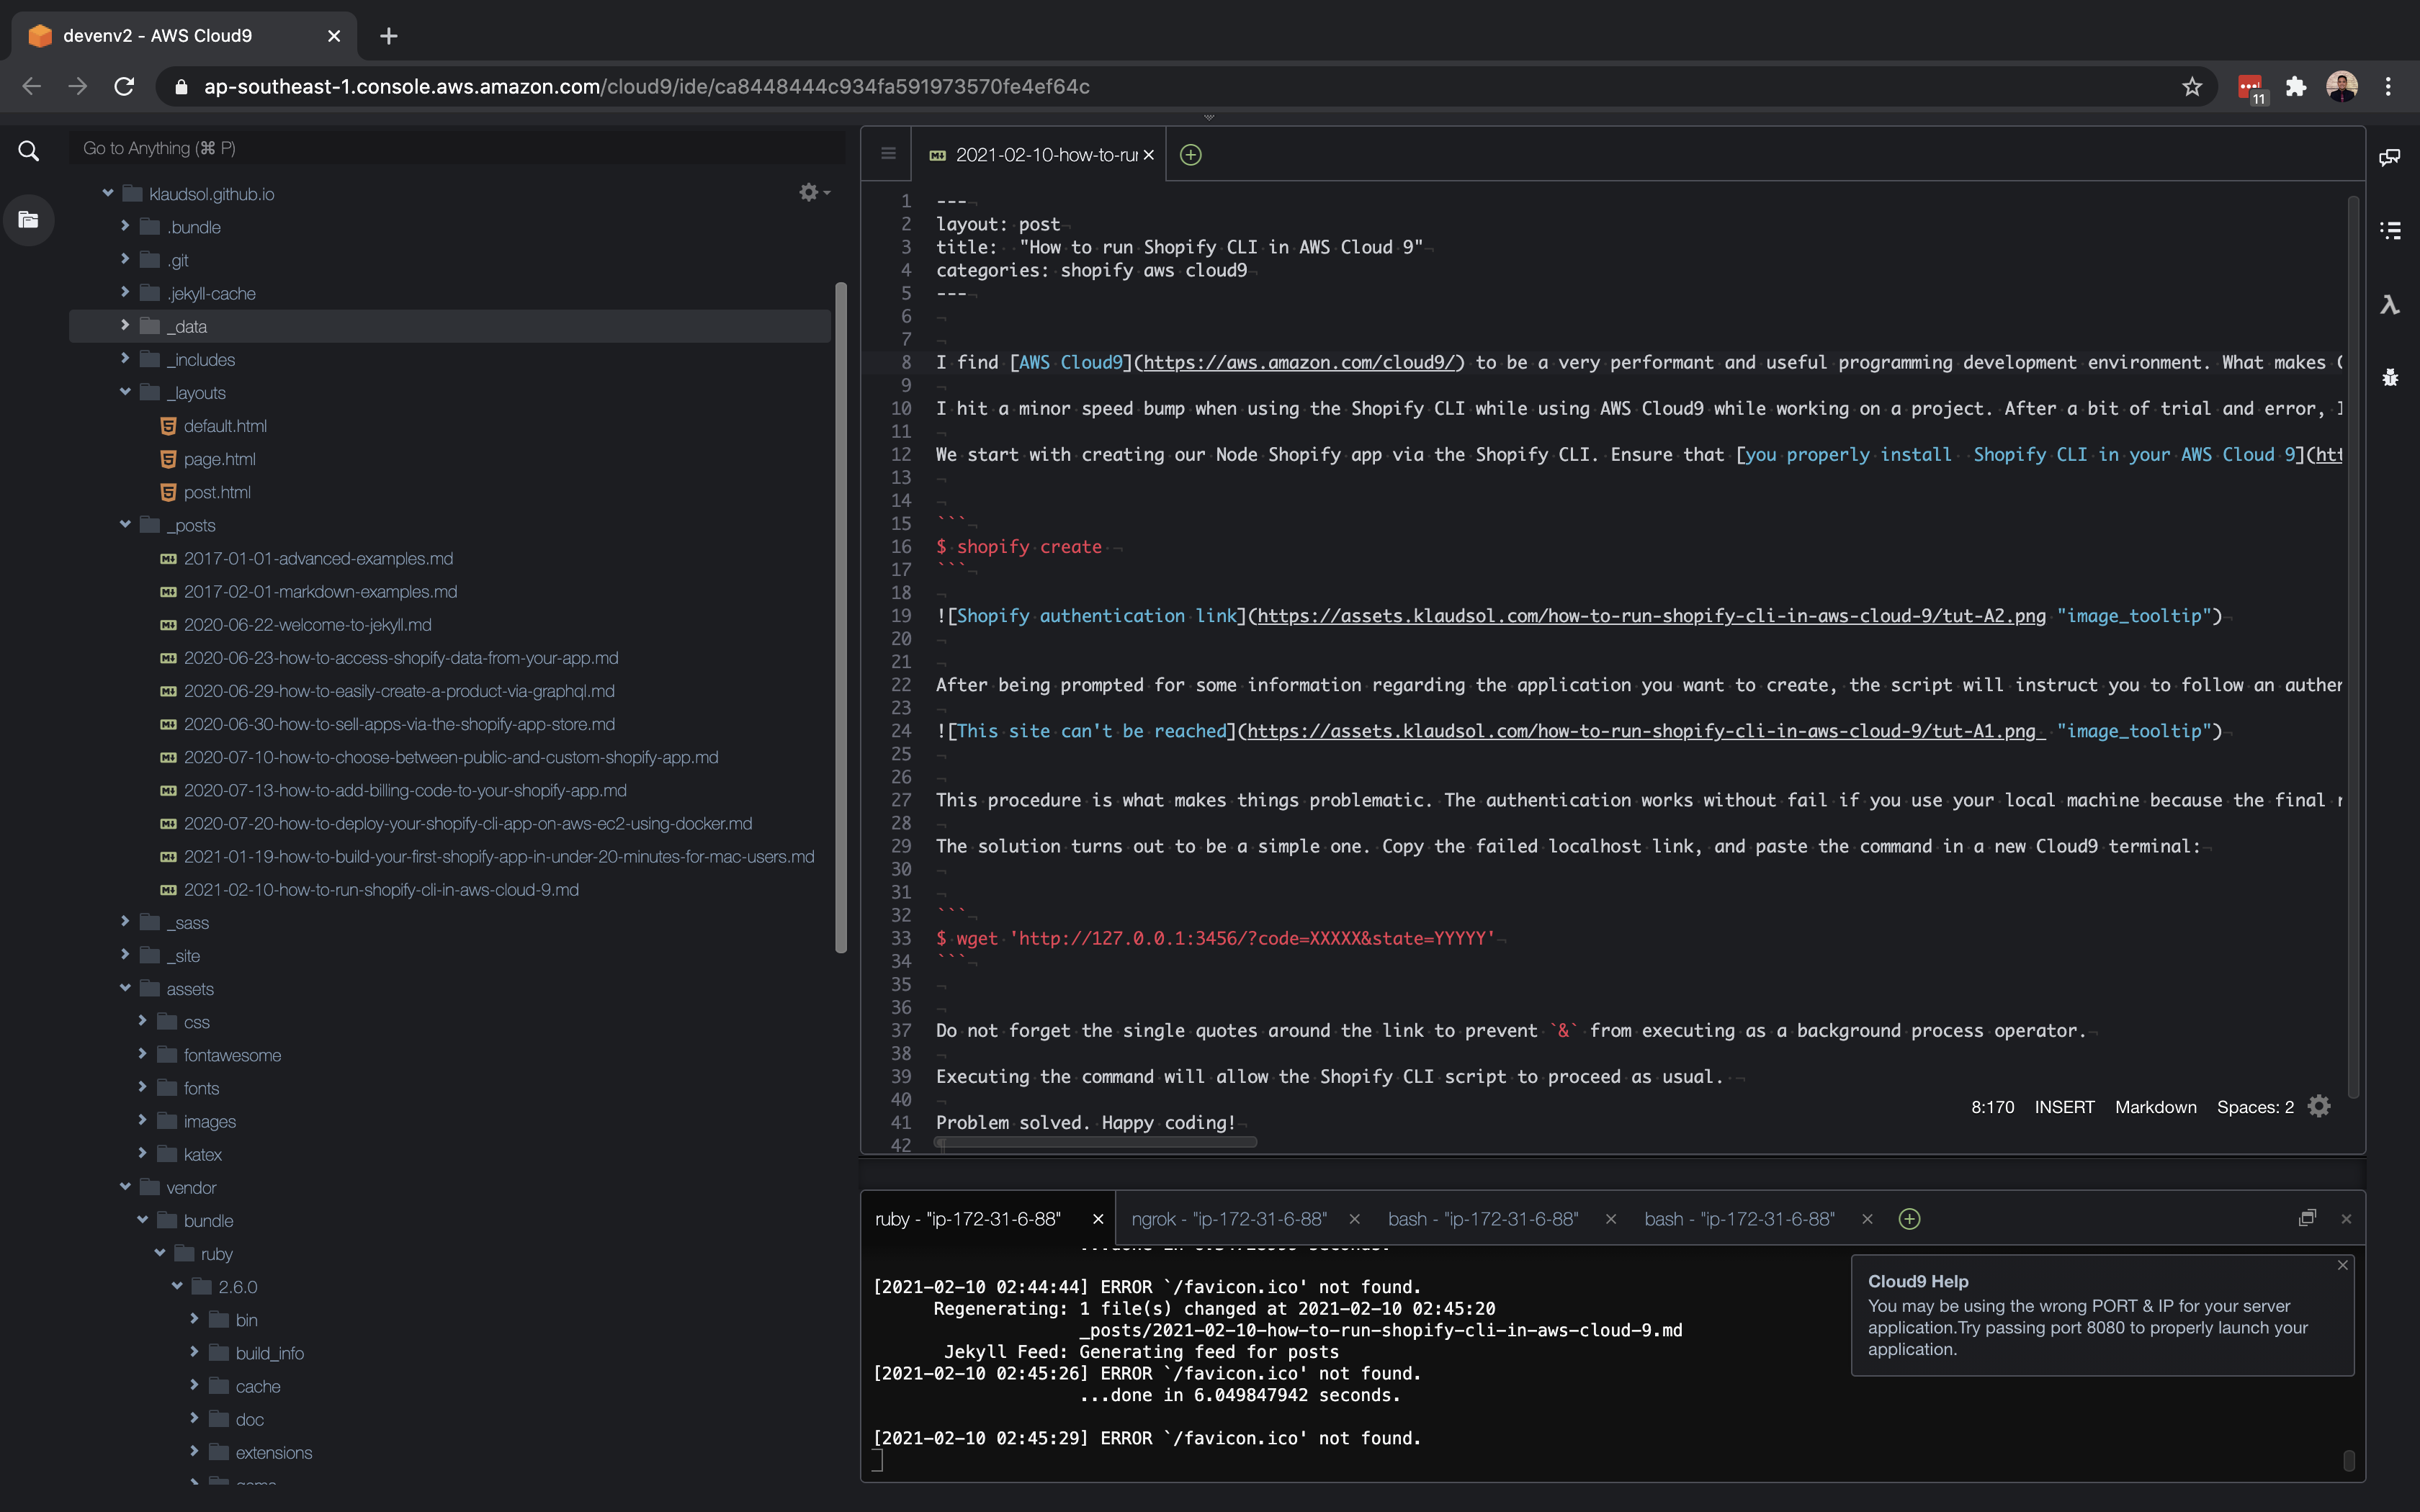
I find AWS Cloud9 to be a very performant and useful programming development environment. What makes Cloud9 so appealing for me is its fast internal network speed, making downloading dependency libraries and containers several times faster than if I rely on my internet service provider. This fast internal network speed is also useful for creating apps that communicate with 3rd party APIs such as Shopify. Developing apps that continually talk to API’s on a slow network is such a pain that it robs developers of all the joys of software development.
I hit a minor speed bump when using the Shopify CLI while using AWS Cloud9 while working on a project. After a bit of trial and error, I found a simple solution that works around the issue.
We start with creating our Node Shopify app via the Shopify CLI. Ensure that you properly install Shopify CLI in your AWS Cloud 9 before proceeding.
$ shopify create

After being prompted for some information regarding the application you want to create, the script will instruct you to follow an authentication URL.

This procedure is what makes things problematic. The authentication works without fail if you use your local machine because the final redirect points to localhost. However, Cloud9 does not reside in your local machine, so we encounter the “This site can’t be reached” message from our browser, and the authentication process halts.
The solution turns out to be a simple one. Copy the failed localhost link, and paste the command in a new Cloud9 terminal:
$ wget 'http://127.0.0.1:3456/?code=XXXXX&state=YYYYY'
Do not forget the single quotes around the link to prevent & from executing as a background process operator.
Executing the command will allow the Shopify CLI script to proceed as usual.
Problem solved. Happy coding!